Wednesday, May 25, 2016

Grapefruit Madelines


Citrus and butter baked into a petite tea cake.  What could be more simple or lovely?  I had my first Madeline when I was 16 years old and have never looked back.  They are a great excuse to have cookies for breakfast so for that reason alone they are a favorite of mine.  I am very much a food purist and when a few ingredients make such a elegant and refined little spongy cake with just a tiny crisp edge I am all in.

You do need a Madeline pan which is a specialized cake pan divided into 12 scalloped divots.  Online you can find many different Madeline recipes and I have to tell you I was surprised how many of them talked about how complicated it is to make a proper Madeline.  I never thought they were difficult to make and you shouldn't either.  Like any cake or cookie - resist the urge to continue mixing the batter after the ingredient are already incorporated.

I substituted Ruby Red Grapefruit for the lemon and it was really nice.


There is no need for a mixer, the batter comes together very easily with just a Tovolo whisk.


The recipe is very straighforward.
Yields: 12  Prep Time: 10 minutes  Cook Time: 7 - 10 minutes
Ingredients:
2 large eggs
1/2 cup sugar
1 T grated grapefruit zest (if making lemon, grated zest from 1 medium lemon)
1 T fresh squeezed grapefruit juice from above grated fruit (same if using lemon)
2/3 cup all purpose flour
1.4 cup butter, melted and cooled

Preheat oven to 350F degrees. Generously spray or butter Madeline Pan.
Beat eggs and sugar in a large bowl until very light and thick.  Very gentle fold in zest, juice, and flour.  Add butter until all ingredients until thoroughly combined.  Be careful not to overbeat.
Fill molds until 2/3 full.  Bake for 7-10 minutes or until set and edges are golden.  Cool 2 minutes.  Carefully transfer Madelines fluted side up to rack to cool.  Dust with powdered sugar if preferred.  


Thursday, May 12, 2016

Epic Cake Fail! or Chocolate Cake with Vanilla Scented, Grapefruit Cream Cheese Frosting


Julia Child said famously "There are no mistakes in the kitchen." (It wasn't exactly that but similar.) Well, Julia can I offer you a spoonful of cake?  
Sometimes things do not work out the way you thought they would.  Adapt and move on is a pretty good life philosophy - it also applies to this epic cake fail.  Mind you, it was delicious just not pretty. And by not pretty, I mean a HOT MESS!  

It started out like any other baking project - I saw something that inspired me and I wanted to try it out myself.  Most of the time it works out just fine.  I am a pretty confident/competent baker but this time not so much.  The inspiration behind this cake was from Sarah Kieffer's rectangle cake from Handmade Charlotte.  It too born out of a good cake gone bad. 
http://www.handmadecharlotte.com/rectangle-cake-with-vanilla-buttercream/

(On a side note, last week was my birthday.  I decided I didn't really need a cake this year.  I made this cake because I changed my mind several days after my actual birthday. Everyone really does need a cake for their birthday and I was happy to make mine.  I chose my family favorite chocolate cake with cream cheese buttercream.  I had gotten some beautiful Ruby Red grapefruits in my farm box so I thought if orange and lemon are good with chocolate why not grapefruit?  In fact, it was chocolate cake with Vanilla Scented Grapefruit Cream Cheese Buttercream.  Whew, that's a mouthful! )


I started by baking the Hershey's BEST Chocolate Cake recipe baked in a 13"x 9" pan.

http://tovolove.blogspot.com/2015/10/the-mad-science-experiment.html

I let it cool completely and then like Sarah did, cut it into thirds.  Ok, this is where I caution you to just bake the cake and either frost it as sheet cake or bag the cake idea altogether and make cupcakes.  I have no idea how Sarah was able to get this to work but hers was just so darn cute!  (Side note #2, I am totally obsessed with Sarah Kieffer and her blog vanillabeanblog.com - she can do no wrong.  Maybe she will offer to make me a birthday cake. :) )


Per instruction, you cut the sheet cake in equal thirds and ice the bottom third, then stack and ice the second third, and then add the third, ice the top and sides.  This is when I knew I was in trouble.  


Can you hear it as it slowly slides off?  I didn't either.  I had my back turned as I was looking for skewers to help support it.  

And...BOOM!


Now we separate a disaster from a creative opportunity.  Luckily, I was making it for myself, the blog, and my lovelies at work BUT what if I were having company?  How could I get this to work for me?  For me, I grabbed my trifle bowl!  If you have not had the experience of picking up cake with your hands and shoving it into a large bowl - I highly recommend it!  It feels great, slightly naughty, and then you have cake and buttercream all over your hands and there's only one way to get clean!  Huzzah!

You could make cake ball/pops.  Mush all the cake together, form balls, and dip in chocolate - delicious!

You could pat a thin layer back into the the sheet pan, put in the freezer for about 10 minutes, add a layer of ice cream, another layer of cake, freezer for 15 minutes, more ice cream, cake, etc!  I kind of want to make it again and turn it into an ice cream cake now!  

The cutest thing that was suggested was from my co-workers' daughter.  She said to scoop it in a Dixie cup and then it is Cup Cake!  Brilliant!  The girl of 5 has a way with cake.  :)

On the upside, my Vanilla Scented Grapefruit Cream Cheese Buttercream was outrageously good AND I added one drop of pink and one drop of yellow food coloring which resulted in the most beautiful color frosting!  It was just a subtle hint of color and looked just like a two-toned tulip that was on my table.  


Recipe for the BEST Cream Cheese Frosting (EVER!)
1 stick of butter, cold!
1 8oz block of cream cheese, cold!
16oz of powdered sugar

Put into the mixer all at once and start the mixer on low. Then clean up the powdered sugar that will inevitably fly out of the mixer.  As everything becomes incorporated, turn up the mixer and let whip.  It will get glossy and smooth.  This is perfect just the way it is but you can add vanilla and/or whatever flavoring you desire.  For this cake, I added 1 teaspoon vanilla bean paste and 1 1/2 teaspoons of fresh squeezed Ruby Red grapefruit juice and a few grates of grapefruit zest.  

The most important part of this take is that the cake was rich and moist with billowy, creamy frosting with just a hint of a tangy citrus essence.  Oh Happy Birthday to me!

Friday, May 6, 2016

Pavlova - Simple Sophistication


Soft, chewy crunch from the meringue, smooth, luscious lemon custard, billowy, slightly sweetened whipped cream, and tart, juicy raspberries all in one layered, enchanting bite.  This, my friends, is a pavlova.  The origin is Australian or New Zealand depending on apparently who you ask, named for famed Russian ballerina, Anna Pavlova in the 1920's.  Technically, a pavlova is the meringue and berries with cream.  I am not sure when the lemon curd got thrown into the mix but it was a smart, smart person who thought of this fabulous addition to the pavlova.

You can flavor the meringue if that makes you happy.  You can use different fruits to make it more seasonal or to just suit your mood.  You could make a different fruit curd or flavor the whipped cream - the options are your for the taking.  For me it is about the layers of flavors and textures all coming together in a unique way.

For the meringue:
adapted from thekitchn.com
Makes one 9" pavlova or 8 mini-pavlovas ( I made an 8" pavlova and 2 mini pavlovas)

Ingredients

For the meringue base:
4 egg whites
1 cup granulated sugar
1/2 tablespoon cornstarch
1 teaspoon vanilla extract
1 teaspoon white vinegar

Instructions

1. Prepare for Baking: Preheat the oven to 275°F with a rack in the lower third of the oven. Line a baking sheet with parchment. Trace an 8" circle on the parchment using a cake pan or dinner plate as a guide. (If making mini-pavlovas, use drinking glasses as guides.) Flip the parchment over. Mix the sugar and cornstarch together in a small bowl. Mix the vanilla and white vinegar together in a separate bowl.
2. Whip the Meringue: Make sure your mixing bowl and beaters are very clean with no residual fat or grease. Pour the egg whites in to the bowl and begin beating at low speed. Gradually increase the speed to medium.
When the egg whites have reached soft peak consistency and the beaters leave trails in the whipped whites, begin adding the sugar a few tablespoons at a time, waiting a few seconds between each addition. While doing this, gradually increase the speed so that you are at maximum speed once all the sugar has been added.
Continue whipping until the meringue holds stiff peaks. Stop the mixer and sprinkle the vanilla and vinegar over the meringue. Beat for another 20 seconds to fully mix.
3. Shape the Meringue: Use a Tovolo Flex-Core spatula or Tovolo Scoop & Spread to scrape all the meringue onto the parchment in the center of the circle. Working from the inside out, spread the meringue to fill the circle. Smooth the sides if desired or leave it in billowy lumps.
4. Bake the Meringue: Put the meringue in the oven and immediately turn down the heat to 250°F. Make for 60-70 minutes for one large pavlova or 50-60 minutes for mini-pavlovas. The pavlovas are done when the outsides are dry to the touch, are very slightly browned, and sound hollow when tapped. It's fine if cracks form in the crust.
Turn the oven off, but leave the pavlova inside with the oven door ajar. Let sit until the pavlova is completely cooled, or overnight. At this point, the pavlova can be wrapped in plastic or sealed in an airtight container and kept for several days unless your house gets very humid (in which case, eat your pavlova right away!).

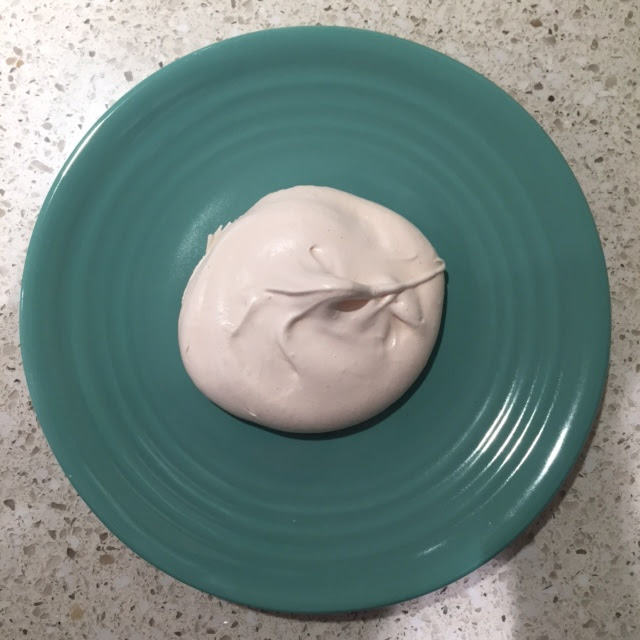
It is so pretty and glossy.  Incredibly sticky and if you are doing it right your hands will be covered in white, sugary goodness. 


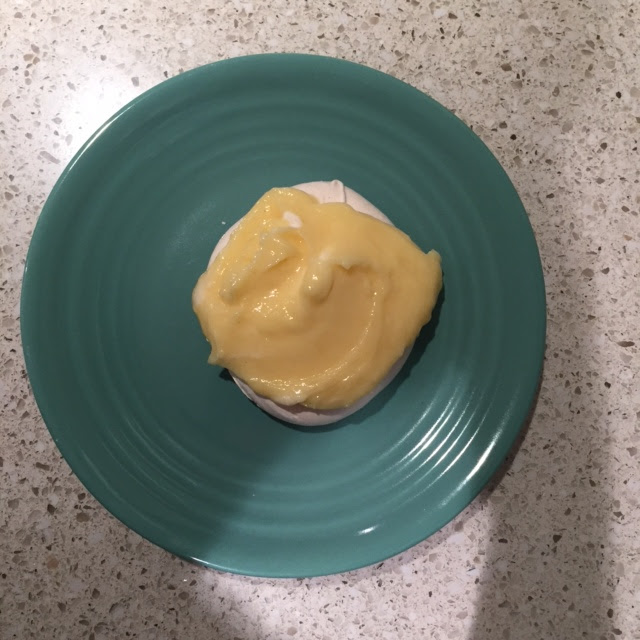
Now for the layering.  I like to have everything done ahead of time.  This is a nice dessert for guests because although you can't assemble them ahead of time, you can made all the components a day or two ahead.  (Not the whipped cream, you want to do that just before you assemble them. It will hold for an hour or two so you could whip the cream before guests arrive.)  Here is the link to the Lemon Curd recipe:
http://tovolove.blogspot.com/2016/05/lemon-curd.html

So, I like meringue, curd, cream, fruit.  You could make little nests out of the meringue and add the fruit in there like a surprise but I think the fruit on top adds color and beauty.  This is your creation so do what you like!  

step 1

step 2


Step 3 


step 4

STEP 5 - EAT IT UP YUM!


Monday, May 2, 2016

Lemon Curd


Lemon curd is like sunshine in your mouth!  Lemon curd on a freshly baked scone is one of my true pleasures in life.  It is the base of Lemon Souffles. There would be no Lemon Meringue Pie without it.  It is a ridiculous topping on good vanilla ice cream.  A little dish of lemon curd with fresh berries will cure anything that aches your soul.  It is like sunshine in your mouth.  

Basically, it is lemon custard but with much more juice and zest.  You can make curd with almost any fruit.  Strawberry curd with a little mint would be divine.  I have had mango curd and passion fruit both of which were equally delectable.  I just saw a recipe for a grapefruit, almond cake that was layered with grapefruit curd = mind-blowing.  Lemon Curd has a smooth, luxurious, juicy, sweet taste. Curd is sweet and buttery but with a tart finish that balances everything out. 


Lemon Curd is easy to make but it does require you to pay attention while it cooks. You need to make sure that the eggs don't scramble when they are incorporated into the buttery, lemon mixture that is cooking on the stove-top.


This is the recipe I have been making for years!  It was originally published by Epicurious as the base to Hot Lemon Souffles, which just happens to be my best friends favorite dessert I make, so I have made this A TON over the last 15 years.  There are other recipes but this one is perfect.

YIELD 
Makes about 1 1/3 cups 

INGREDIENTS

    • 1/2 cup fresh lemon juice
    • 2 teaspoons finely grated fresh lemon zest
    • 1/2 cup sugar
    • 3 large eggs
    • 3/4 stick (6 tablespoons) unsalted butter, cut into bits


PREPARATION

    1. Whisk together juice, zest, sugar, and eggs in a 2-quart heavy saucepan. Stir in butter and cook over moderately low heat, whisking frequently, until curd is thick enough to hold marks of whisk and first bubble appears on surface, about 6 minutes.
    2. Transfer lemon curd to a bowl and chill, its surface covered with plastic wrap, until cold, at least 1 hour.