Thursday, January 28, 2016

Braided Sour Cream Cardamom Coffee Bread


I like brunch.  I like brunch foods.  I like that you can eat a cinnamon roll with a lobster frittata and no one judges you.  I have been needing some new items to add to my repertoire though.  I saw this recipe on honestlyyum.com and I thought I would give it a whirl.  I will also say (but if you read this blog with any regularity than you know this already) I am kind of obsessed with the Tovolo Pastry Mat and so consequently I have been obsessed with dough.  

This little gem of a brunch item has SO many filling options it will become my and hopefully your new rock-star brunch dish. It is also perfect for an afternoon snack with tea or cocoa!  The one I made had raspberry jam and a cream cheesy type filling but the original recipe had blackberries.  Obviously, you can use any type of fruit and if cardamom is not your thing you could leave it out or sub cinnamon. OR if you made a savory version you could add a little crushed black pepper or thyme to the dough and it would take on a whole new level.  SO MANY OPTIONS!

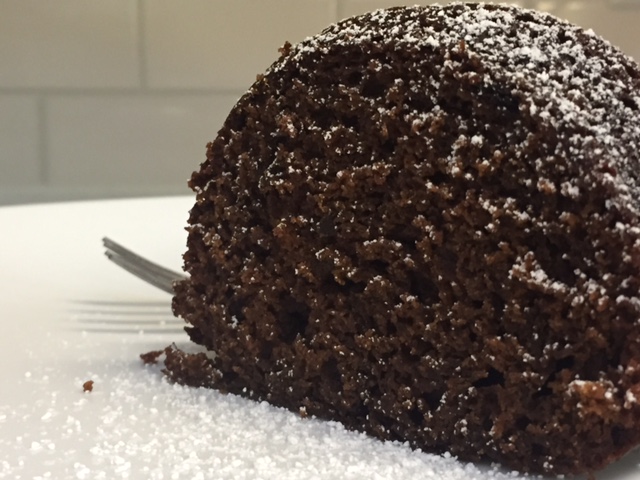
The texture was really lovely.  It was not too sweet and reminded me of a very European style breakfast pastry.  Not flaky like a croissant or Danish but more like the texture of a Challah bread. Similar consistency to a cinnamon roll dough but not as sweet.  The filling was creamy but not heavy and the jam added a nice mouth feel.  I loved the cardamom seeds in the dough - it added just a little unexpected pop of flavor in your already party of a mouth.


The recipe was very easy to follow.  The dough rises twice so you do have to plan a little but the execution of the braid was very simple.  If you are using a Tovolo Silicone Pastry Mat please remember not to use a knife directly on the silicone.  The Tovolo Sccop & Spread is a perfect dough cutting tool.  You could also use the Tovolo Pizza Cutter because it has both a Stainless Steel blade (not silicone mat friendly) and a plastic blade (silicone mat friendly) that is perfect for non-stick surfaces. Also, if you don't have a mixer with a dough hook, the Tovolo Dough Whisk and your hands work just as well.  Kneading bread dough is an amazing stress reliever! 


The cutest part of this braiding experiment was after the breads were baked my grand nephew came over for a Cocoa Party.  I was in the Northeast and we had just gotten about 6 inches of fresh snow.  We took a very snowy tromp around the neighborhood, made some cocoa, and ate warm Cardamom bread! Perfect afternoon!


Ingredients for the bread:

  • 3 cups of all purpose flour
  • 1/2 cup of Daisy sour cream
  • 3 tablespoons of sugar
  • 1 teaspoon of salt
  • 1 teaspoon of ground cardamom seeds
  • 4 tablespoons of unsalted butter, softened
  • 1 large egg yolk (reserve the white)
  • 1/3 cup warm water
  • 1 tablespoon of active yeast
  • grapeseed oil or other neutral oil

Ingredients for the filling and topping:

  • 1 8-ounce package of cream cheese, softened
  • 1 tablespoons of sour cream
  • 1/4 cup of sugar
  • 1/8 teaspoon of salt
  • 2 tablespoons of all purpose flour
  • 1 large egg
  • 1 cup of raspberry or other fruit jam
  • 2 teaspoons of ground cardamom
  • 2 tablespoons of all purpose flour
  • handful of sliced almonds (optional but really pretty)
  • 1 tablespoon of heavy cream (or water)

Directions:

  • In the bowl of a stand mixer fitted with a hook, dissolve the yeast in the 1/3 cup of water and 3 tablespoons of sugar until the mixture is frothy. While the mixer is running on low-medium speed, add the salt, cardamom, egg yolk and sour cream and mix until combined. Begin adding the flour about half a cup at a time. Between adding the flour, add the butter a tablespoon at a time until incorporated. The flour should pull away from the bowl, but should not be too dry.
  • After the dough comes together, knead the dough in the mixer by running the mixer on low-medium speed for about 10 minutes.
  • Remove the dough and form into a round shape. Rub the inside of a bowl with some grape seed oil and place the bread into the bowl and cover with a towel. Allow the dough to rise for 90 minutes.
  • Divide the dough into two pieces and on a lightly floured surface roll each piece into a roughly 10 x 15 inch oval or rectangle.
  • To make the filling, in the bowl of the mixer fitted with the paddle attachment, combine the cream cheese, sour cream, sugar, salt, 2 tablespoons of flour and egg until combined.
  • In a separate bowl, mix the raspberry jam, ground cardamom and 2 tablespoons of flour.
  • Using a bench scraper, pizza wheel or knife, cut 1/2 inch thick stripes at a slight angle on each side of the rolled out dough, about 1/3 of the width of the entire piece of dough so that 1/3 on both sides are cut into strips.
  • Slather half of the cream cheese mixture down the middle of the dough and then pour half the jam over the cream cheese.
  • Starting from the top (with the strips pointing downward), fold each strip across the cream cheese and jam, alternating left-side and right-side so that each strip overlaps the next. For the ends, just tuck one piece under the other. Repeat with the other piece of dough.
  • Carefully and quickly, transfer the logs of braided dough to a lined baking sheet.
  • Cover with a towel and allow to rise for another 90 minutes. The breads won’t look that much bigger.
  • Preheat the oven to 350 degrees.
  • Mix the remaining egg white and cream and brush it over the breads. Sprinkle the tops with sliced almonds.
  • Bake for about 20-25 minutes until golden brown, turning the pan around halfway through the baking.
I am including the link to honestlyyum.com because their photos are stellar and if you need help with the braiding the pictures break it down nicely.


Wednesday, January 13, 2016

Snack Cake - BRING IT BACK!


Snack and cake are two words that fit beautifully together.  Snack cake is kind of an outdated term but I am going to start a movement to bring it back!  Snack cake should be hands friendly, good for breakfast, great with tea or coffee, easily packed in a lunch box, and a simple one bowl creation.  I think of snack cake as being a little denser in texture and generally unadorned.  No icing, no fluffy embellishments, no decorations - just a little powdered sugar or a light glaze on top.  

A few months ago I made a delicious Peanut Butter Snack Cake from Molly Yeh. It was so moist in texture it was almost sticky. It got me reevaluating the need for good snack cake in the world.  In my quest to bring Snack Cake back to the forefront, I came across this lovely little spicy number from the blog The Clever Carrot.  It is such a happy, wintery cake that combines chocolate and warm spices which has got to be one of the all time most underrated pairings.  Cocoa should really be considered a spice.  It mingles so nicely with ginger, cinnamon, cardamom, and chili spices.  

As I said before, snack cakes should require less time and mess than a full blown cake recipe.  I made this one at 8:00pm last night (not my favorite time to start whipping up cakes) in one bowl.  It was done and out of the oven before 9:00pm.  


The recipe calls for mixing all the wet ingredients together in bowl and then sifting the dry into the same bowl.  My favorite ingredient in this cake is the molasses.  It really adds a depth of flavor that helps the cocoa and spices shine. Emile's recipe lets you choose between maple syrup and molasses but definitely go for the molasses. I also added a little (1 Tablespoon) of coffee to the wet mixture. I subbed cardamom for allspice as well.  I omitted the chocolate chip (because I didn't have any on hand) but also because I liked the simplicity of an old fashioned snack cake without any need for more sugar.  The cake didn't need the chocolate chips but it would also be delicious with them.  (Duh!)

I will continue to post snack cake recipes to help ignite my movement!  Snack Cakes of America Unite!  Peanut Butter Snack Cake, Apple Snack Cake, Lemon Snack cake, what's your favorite?


This is the kind of slice that you wrap in waxed paper and take it to work or school in your lunch box.

Recipe adapted from The Clever Carrot
http://www.theclevercarrot.com/

Ingredients

2 eggs
splash of vanilla
1 T brewed coffee (optional)
1/2 cup plain yogurt

1/2 cup maple syrup (or molasses- this will add more flavor)
1/4 cup melted butter
1/3 cup olive oil
Dry:
1 1/2 cup all purpose flour
1/2 cup cocoa 
1 cup dark brown sugar, packed
1 tsp baking soda
pinch of salt
1 1/2 tsp ginger
1 tsp cinnamon
1/4 tsp cardamom
1/4 tsp nutmeg
3/4 cup semi-sweet chocolate chips (optional)

Method

In a large bowl, whisk the wet ingredients together. Sift the dry ingredients directly over the wet ingredient bowl. Mix gently to combine. Fold in chocolate chips. Pour into greased 10 cup capacity bundt pan. Bake @350 F for 40-50 minutes. To finish, dust with powdered sugar when cool.

Thursday, January 7, 2016

Just being Fancy on a Weekday!


My mom is a great cook.  She was a Home Economics major in college in the 50's. Growing up I was fed perfectly balanced meals and homemade baked goods when I got home from school. My clothes were always pressed and adorable (she made most of them) and she knew (still knows) how to make a dollar go farther.  Our dinner plates were reflective not only of the relevant food groups but also by color because a colorful plate was a nutritious plate.  (Think about all the "beige" foods we eat today - she is a smart lady.)

When I was little, I can remember one of the staples in her food repertoire was Cheese Souffle.  I thought everyone ate cheese souffles on Tuesday nights. There wasn't anything fancy about it.  It is just eggs, leftover cheese, and milk - almost every kitchen has those ingredients on any given night.  I was recently at my Mom's house over the holiday and we were talking about her Cheese Souffle and how long it had been since either of us had made one.  I will give you three guesses what I made for breakfast on New Year's Day...1,2,3!

Yup, Cheese Souffle!
Let's demystify this allusive little gem.

Eggs - room temperature eggs are preferable.   You need to separate the yolks from the whites and not have ANY yolk in the whites at all or the whites won't be the right consistency.  Tovolo Yolk Out can assist you quite nicely for this task. 


Milk - I prefer 2% or whole milk.

Cheese - ok here is where your creativity comes in.  My mom always used whatever we had leftover in the refrigerator.  You can use whatever you like.  I think using multiple cheeses is more interesting and flavorful but if cheddar is what you prefer than cheddar it is!  For the souffle in the picture, I used 1 part cheddar, 1/2 part Gruyere, and 1/2 part sheep's milk cheese with black truffles.

First you make a roux - half butter, half flour.


Then add milk and bring to a boil.  It will begin to thicken and kind of look like paste.  Meanwhile whip the egg whites until they come to stiff but not dry peaks and set aside.


Temper your egg yolks.  This means adding a few tablespoons of the hot milk mixture to the egg yolks and DO NOT STOP whisking! If you do the eggs will cook too quickly and scramble.  Add the egg yolk mixture back to the rest of the milk mixture in the pan and continue to stir.  Remove from heat and add the cheese and stir until melted and incorporated.  
Now, take about 1/3 of the egg white and stir it into the cheese love.  


Then gently fold the rest of the egg whites into the cheese mixture.  I used Tovolo's New Flex-Core Spatula!  More on that another time - shhh, it's a secret...

Pour the batter into a well buttered Souffle dish and smooth out the top.  If you are REALLY fancy, take your spatula or a knife and lightly draw a circle on the top.  This will be the part that rises up further than the rest, called a top hat. Not necessary at all but kind of looks cool.


I know it sounds like many steps but it comes together really fast and it will be so light and fluffy in your mouth that you won't remember why you were ever intimidated by eggs, milk, and a little cheese!  YUM!


So the recipe is from an early 1980's Sunset issued Cookbook.  There is no longer a cover on the the spiral bound book.  :)
Here is the recipe:

3 T butter
3 T all-purpose flour
1/4 tsp salt
pinch of nutmeg
pinch of freshly ground black pepper
1 cup milk
4 eggs separated
1 cup shredded cheese (Cheddar, Gruyere, Swiss - all good cheese choices)

Preheat over to 450 degrees.  In a 1 quart pan over medium heat, melt butter.  To make a roux, stir in flour, salt, and spices and cook until mixture bubbles. Continuously stir for 1 minute. (This cooks the flour so it does not leave a chalky taste - also helps create flavor.)  Remove from heat.  With a whisk, stir continuously while adding the milk.  Return to heat and cook, until sauce boils and thickens to the consistency of thick paste.  Turn off heat.
Lightly beat egg yolks.  Spoon about 2 tablespoons of the sauce into the yolks and stir until the sauce has been incorporated.  (This is tempering the eggs.) Stir egg yolk mixture back into the sauce.  Stir in cheese until it melts and set aside.
Beat egg whites until frothy.  Add cream of tartar and beat until soft, moist peaks form.  Fold about 1/3 of the beaten egg whites into the sauce mixture.  Then add the sauce to the rest of the egg whites. Gently fold sauce and egg whites together.
Pour into a well-buttered 1 1/2 quart souffle dish.  
Bake for 10 minutes at 450 degrees and then reduce oven temperature to 250 degrees and bake for another 10 to 15 minutes more.  You are looking for the top to be golden and the center to jiggle just a little bit.  When you check for doneness, be quick about it so that the oven temperature doesn't drop much - that will sink your beautiful souffle!  Take a picture of this beauty and then serve immediately.  (I make everyone gather around and look at it before we dig in. )  
Serves 4

Wednesday, January 6, 2016

Pretzel Bites!


Warm dough tossed in butter and sprinkled with sea salt...can you smell it? Pretzel bites baking smell like an Amish Farmer's market in the Fall.  Oh wait, I can smell it because I just took these gems out of the oven!  I am SO lucky!  You can be too!  

I had been craving soft pretzels. You know, the kind at the mall that you know better than to eat but the smell draws you in.  They also have those unnamed stands in airports where you are captive and where your force fields of will are rendered defenseless.  Homemade pretzel bites are SO much better.  I have looked at tons of recipes for pretzels and many of them take a hazmat suit to make properly.  I am never up for eating something I am not suppose to touch with my hands.  Duh.

Leave it to good ole King Arthur Flour to create a delicious and easy recipe that does not disappoint.  They are chewy and soft but have a great outer pretzel crust with a warm, slightly doughy center.  I coated them all in melted butter and then tossed about half in a brown paper bag filled with cinnamon sugar and the remainder with a course sea salt.  Is it possible that you can taste golden brown?  There is also a distinctive note in the taste of a proper soft pretzel and I was so surprised when I could totally taste that in the homemade version.
The dough comes together really easily and does not even require a rolling pin! 


Once again, invaluable to my baking process is the Tovolo Silicone Pastry Mat.  Remember not to use a knife blade on the Pastry Mat - I use the spreading end of a Tovolo Scoop & Spread. 


Bites before their bath...


And after...


I made a few proper pretzels as well for fun.  It would be great to make a batch for a small group at a football party or bites from a movie night.


Everything is made better by cinnamon sugar!

King Arthur Flour Easy Pretzel Bites


DOUGH

  • 2 1/2 cups King Arthur Unbleached All-Purpose Flour
  • 1 teaspoon salt
  • 1 teaspoon sugar
  • 2 1/4 teaspoons instant yeast
  • 7/8 to 1 cup warm water*
  • *Use the greater amount in the winter, the lesser amount in the summer, and somewhere in between in the spring and fall. Your goal is a soft dough.

TOPPING

  • 1 cup boiling water
  • 2 tablespoons baking soda
  • coarse, kosher or pretzel salt; or coarse 
  • 6 tablespoons unsalted butter, melted
  • cinnamon sugar

Instructions

  1. To make dough by hand, or with a mixer: Place all of the dough ingredients into a bowl, and beat until well-combined. Knead the dough, by hand or machine, for about 5 minutes, until it's soft, smooth, and quite slack. Flour the dough and place it in a bag, and allow it to rest for 30 minutes.
  2. While the dough is resting, prepare the topping: Combine the boiling water and baking soda, stirring until the soda is totally (or almost totally) dissolved. Set the mixture aside to cool to lukewarm (or cooler).
  3. Preheat your oven to 400°F. Prepare a baking sheet by spraying it with vegetable oil spray, or lining it with parchment paper or a Tovolo Baking Mat.
  4. Transfer the dough to a lightly greased work surface, and divide it into six equal pieces.
  5. Roll the six pieces of dough into 12" to 15" ropes. Cut each rope crosswise into about 12 pieces.
  6. Pour the cooled baking soda solution into a pan large enough to hold the bites. Place the bites into the solution, gently swish them around, and leave them there for a couple of minutes. Transfer them to a greased or parchment-lined baking sheet, and top with pretzel salt or sea salt. (Or use a Tovolo Silicone Baking Mat)
  7. Bake the bites for 12 to 15 minutes, until golden brown. Remove them from the oven, and roll them in the melted butter.
  8. For cinnamon-sugar pretzels, toss with cinnamon-sugar once you've rolled the bites in the butter.
  9. Place on a rack. In you're not going to enjoy them immediately, store the bites, well-wrapped, at room temperature. Reheat briefly before serving. Take my advice and eat them right away,  I re-heated them on day two but I didn't think they were nearly as delicious.
  10. Yield: about 6 dozen bites.